

Introduction
Background
Using the Code
- Using SQL Server Membership database (Kind of Form Authentication)
- Using Local System authentication (Windows Authentication)
- First, we need to setup the SQL Membership database. In order to create that database, please follow the steps:
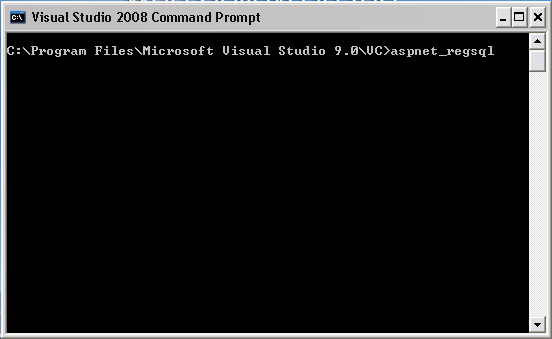
- Go to Windows Start menu>>All Programs>>Microsoft Visual Studio 2005/2008>>Visual Studio Tools and click Visual Studio 2008 Command Prompt
- Type aspnet_regsql and press Enter key from the keyboard.
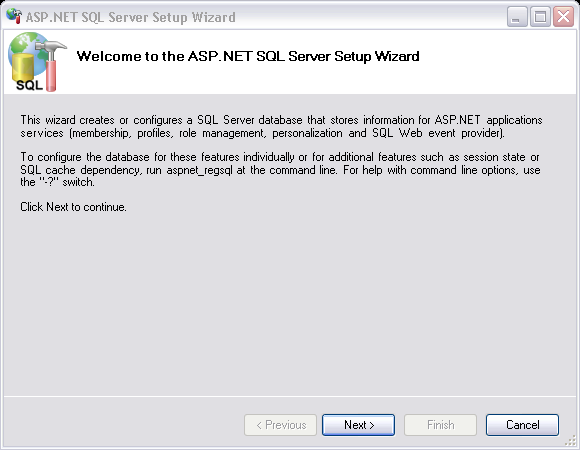
- This will launch SQL Membership Wizard as follows. Click Next button to continue.
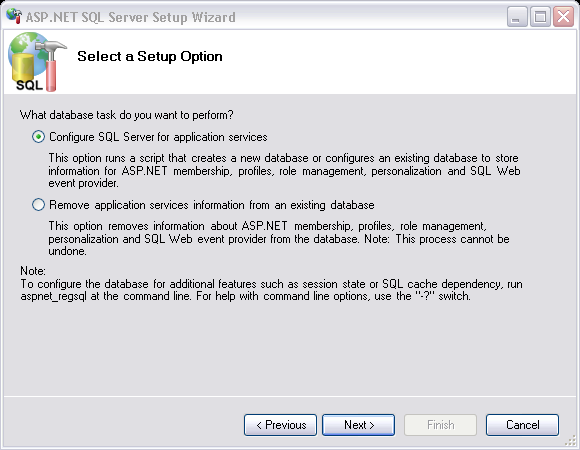
- On the next screen select the first option to "Configure SQL Server for application services". Click Next to continue.
- This screen is important as you will mention the Database
information here. On the basis of that, table structures and other
things will be created. You can use an existing database or create a new
one.

- After filling all the information click next and Finish. :) You guessed right, your SQL Membership database is ready now.
- Now let's connect our ASP.NET Website application to this database. For this, first create an ASP.NET website in Visual Studio 2005/2008.
- Now open the Web.Config file for the project and add a well qualified Connection String for the SQL Server Membership database you are going to use.
<connectionstrings>
    <add name="abcdCS" connectionstring="
    Data Source=myserver\sqlexpress;Initial Catalog=abcd;
    User ID=sa;Password=pass"
    providername="System.Data.SqlClient" />
</connectionstrings>
This Connection String will be used by the ASP.NET Configuration for connection with the database.
- After that, click on VS 2005/2008 Project menu>>ASP.NET Configuration
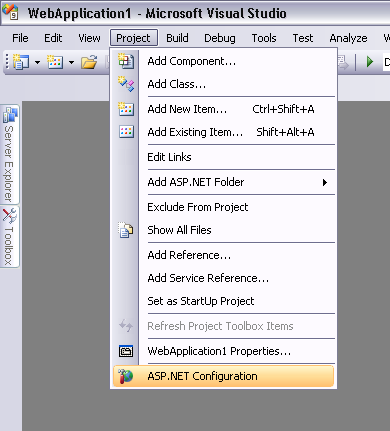
- This will launch the ASP.NET Web Site Administration Tool. Here, you will test the database connection, manage users, roles, permissions, etc.
- First click on the Provider tab.
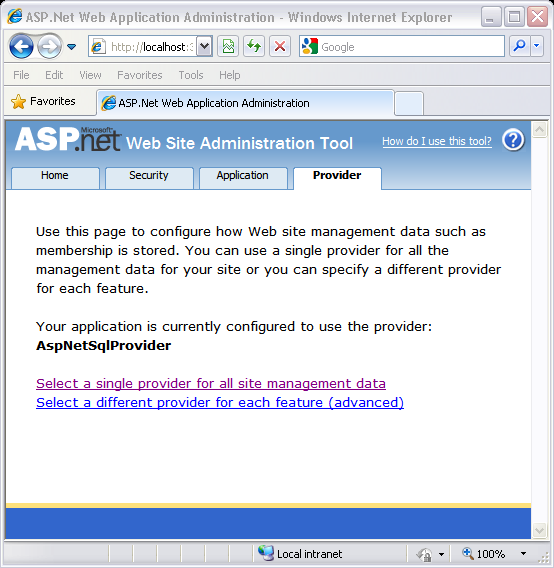
Here you will be testing the database connection. Click on both the links one by one to test the connectivity with database.
- Clicking the above links will show screen as mentioned below:
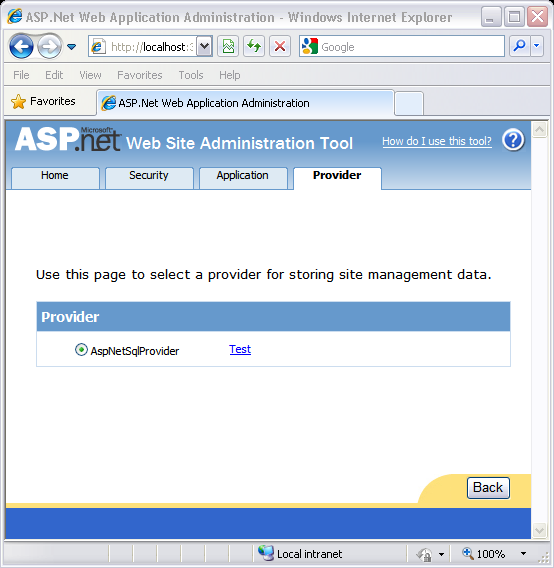
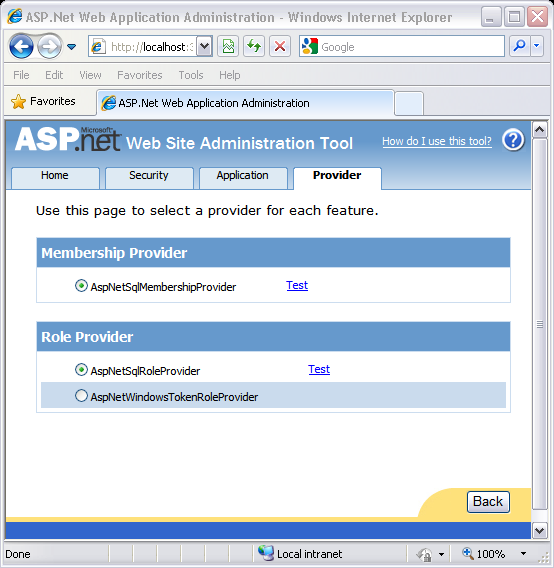
Click the "Test" link in each screen to check the connection status.
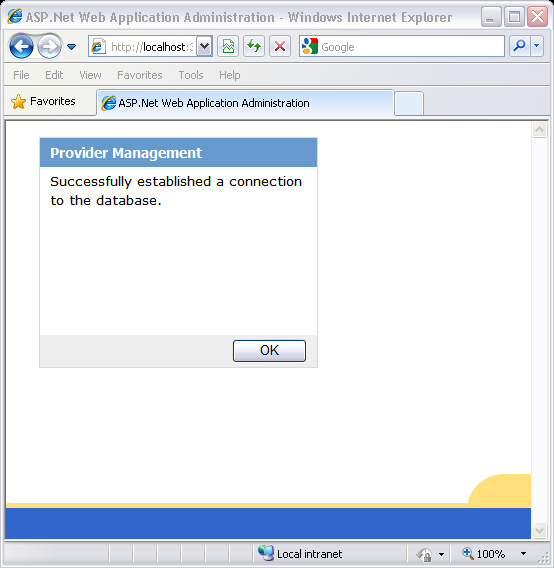
- If your connection is successful, you will get a screen like this:
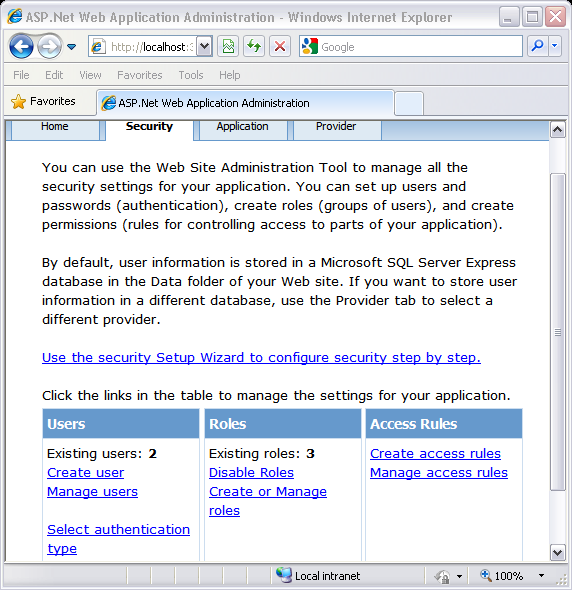
Now in order to select authentication types, create users, manage roles, and access rules, you need to see the Security tab.
In order to setup the SMTP settings, Application Settings, Debugging and Tracing settings, and default error page, you need to visit the Application tab.


0 comments:
Post a Comment